Now much has been said about the front indicators on the standard Zero and the fact that you need to add extensions to them so they pass the IVA. Frankly, they are a means to an end. It all comes back to building the car to pass the IVA. After that, do what you like. This is how I sorted them out.
In the kit, you get the indicator and a piece of metal that needs bending to form the extension. Make sure you also get the nuts fro the indicators as they are a strange thread. What you will also need is something to cover the extension. What I bought were Landrover shock absorber covers from the bay of E, although I am sure there are lots of other suitable alternatives. The other bits you will need are 10mm by 35mm threaded tubes. Again I got these from the bay of E from a lighting shop as these are used in the manufacture of side lamps etc. The final thing you can see is an aluminium disc that I cut from an off cut. This is to hold the end of the rubber cover firmly in place.
First job was to bend the extensions. Once done I fitted a bolt tot he threaded tube, and then araldited the extension to the disk with the tube in place. Once it was all dry, I sprayed it with black Hamerite, just to protect it. You can just make out a small hole above the main hole in the end of the bracket. This is for a small lug on the indicator to stop it spinning round.
Here are the bits all laid out ready to go together.
Here you can see the nut and lock washer inside. It is is all a bit fiddly to do, but with patience, it does all go together OK.
And here is a finished item and the other waiting to go together.
Finally, here it is fitted to the nose cone. Personally, I don't think it looks that bad.
Here it is from the inside. I have some larger washers for when I fit it permanently, just to spread the load out a bit.
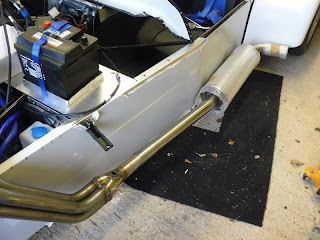
Last job of the day was to see what the exhaust would look like. I still have the Catalytic Converter fit.
Following this, I took all the panels off the car ready to go off to the body shop to be professionally sprayed in ......... well you will just have to wait and see what colour I have chosen.


No comments:
Post a Comment