Saturday 17 December 2011

Battery Tray And Dash

There hasn't been a lot of progress on the car for a few weeks as I have been busy gigging, but I had a rare Saturday off today so I decided to get some things done.

First job was to fit the battery tray panel.  I had already fitted the battery tray to the panel but had held off fitting it to the car until I was pretty sure I didn't need any access underneath it.  It was a simple task of lining it up and drilling some 3.2mm holes, de-burring and cleaning, laying a bead of silicone and fitting in place.  Here it is, job done.


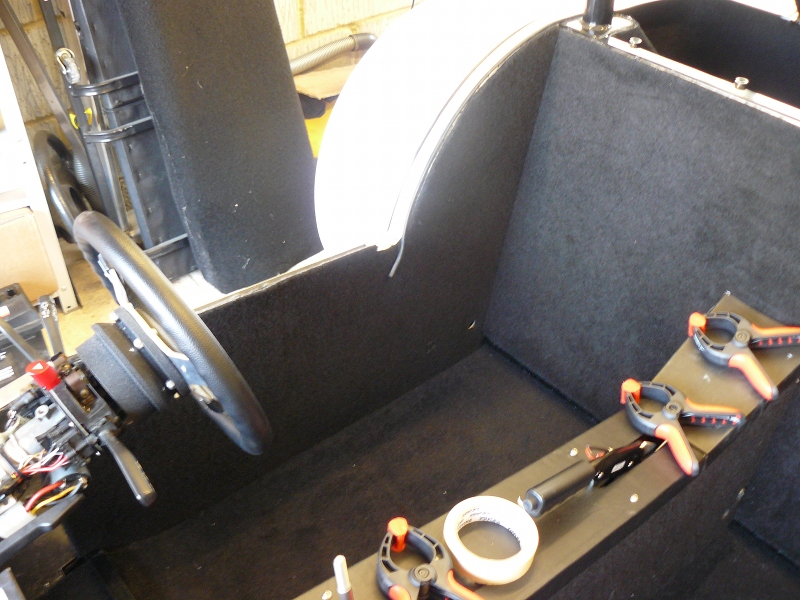
Next I fitted the scuttle back on the car and started to bolt things on to it like the fuse box and the ECU.  It is all going to be a bit tight behind the dash so it will need a bit of careful thought as to where the wires are routed.  I had hoped the scuttle would now be finally fitted but I have a feeling it will need to come of again, or at least loosened to get the dash fitted.


Talking of the dash, I have been trying to decide on the final colour of the car and, accordingly, the dash colour.  My Son in Law has offered to paint the car for me but he is snowed under with work and family commitments so I don't feel now is a good time to be asking this favour of him.  I can always get it done another time.  Anyway, this means that I am going to leave the car white/aluminium but as I have gone for magnolia dials, I didn't think the dash would look right white as well.  Having seen a couple of others cars with carbon dashboards, I decided this was the way to go.

Now I wasn't about to spend £100 on a proper carbon dash when I have a perfectly good GRP one to work with.  I bought some 3M carbon covering and have used that.  The only other thing I had to buy was a hair dryer and that cost all of £8.99 from Tesco.

I cleaned up the GRP and set about laying on the carbon covering.  The flat surface was fine but doing the curved parts was more of a challenge.  This is where the hair dryer is invaluable.  You heat up the carbon covering and it turns in to a much more pliable material allowing it to be molded round the complex curves.  As it cools down it hardens up and retains the shape.  Below you can see me working my way round the back of the dash.


And here is the finished product, with the holes for the instruments and warning lights cut out.  There are still a couple of little bits to tidy up but this will all be hidden by the instruments and the  stainless trim.  I must say that I am pretty pleased with the finished result.


I thought I would just see what it would look like with the instruments fitted.  So here it is without the instrument surround.  It looks OK but I am not sure how I would deal with the T shaped hole for the warning light module.


And with the surround. This deals with the warning lights a lot better and would just end up with a proper T shaped cover for the warning lights that displays the little symbols with the right colours.


Talking of the warning lights, as you can see from the dash above, I have opted for the all in one T shaped lights.  I have also gone for the plug and play instrument loom from GBS.  The only problem was that there was a socket for the warning lights but no little loom to join it with.  A quick call to GBS and Ben came to the rescue.  I sent him the loom and the T module and he made me up a loom, and a nice job he made of it too.  It was all back to me within a week and all for a very reasonable cost.  Here is the instrument loom and the warning light loom.


So that is it for a couple of weeks now due to Christmas and New Year.  I am aiming to have the car ready to go to the factory for the IVA check over and then the test its self by the end of March.  Only time will tell if I can stick to that deadline.

Sunday 27 November 2011

Harnesses and Gaiters

I had been waiting on a set of harnesses from GBS.  They were having them re-made so they were a little bit longer and therefore more IVA friendly.  Anyway, they turned up this week so I set about fitting them.

Here they are as they come out of the packet.  1 set of harnesses with 4 fixing bolts and 4 collared spacers.  GBS also supply 4 longer bolts to fit the fixing points on the chassis behind the seats


They are very simple to fit.  Here is the mounting point behind the drivers seat.


An here is the finished job.


An here are both fitted.


In the picture above, you can see the gaiters I have bought for the gear lever and handbrake.  They are leather with blue stitching from a seller on e-bay and are actually designed for a Westfield, but do the job nicely.

The only thing missing was some sort of trim.  I found these carbon effect ones on the Europa Spares web site.  They do they job nicely.  The gear knob was also from the same place.  I wanted a blue finish but they no longer do them, so this is a sort of gun metal finish.


And the handbrake.


Saturday 19 November 2011

Carpets (part 2), Seats, Trim, Exhaust Cut Out

Continuing on from my last post, I carried on with the job of fitting the carpets.  I had fitted the floor pieces and now moved on to the tunnel sides.  There was a bit of trimming required and I had to cut new holes for the diff bolts and the seat belt mounting points as these have been moved forwards on the later chassis.  Fitting them was the same process as with the floor sections.  Spray adhesive on to the carpet and on to the panel, let it dry for a minute or so and then put it in place.  You have time to move it around a little or remove it and try again as it doesn't fully set for a few hours.

Now you may notice in the picture below that there is rather a lot of over spray and mess on the carpet near the bend in the chassis near the gear lever (there is some in the boot as well!).  Well fear not, my kit building chums, help is at hand.  You can buy a can of glue remover from Homebase and it cleans up all the excess glue, wet or dry.  It is great stuff and I have ended up using a fair bit of it!!


I repeated the process for the other side in exactly the same manner and then moved on to the rear panel.  I thought about fitting one side then folding half over and doing the other, but in the end I fitted it as 1 big panel.  It takes a bit to line it all up, but once there, it looks good.


Next job was the foot well ends.  I had to mark out and cut holes for the bolts holding the high pressure fuel pump, but other than that, it was straight forward.  Same on the passenger side with the bolts holding the washer bottle.


With the tunnel sides now carpeted, I couldn't resist fitting the tunnel top panels.  Now this may be a little over the top, but hey, who cares, but I have painted the hex bolts that hold the panels in place black, so they blend in with the carpet and vinyl a bit better.


Here is the rear panel.  I ended up having to trim this down a bit to get it to fit correctly, but it looks OK.

Here is the main centre panel with the iPod fitted and working.  I plugged in the power cable and the headphone extension cable and checked it all worked and it did.  Job's a good 'un!  I have ordered some gaiters for the handbrake and gear lever so that will help finish things off nicely.


Back to the carpeting.  Like the tunnel panels, the crescent panels had to have new holes cut for the seat belt mounting points but again, fitted easily enough.  There is excess material that has to be trimmed afterwards, but that is no worry.


And the other side.


The final piece to fit was the foot well side.  This had to be cut from the roll of carpet I had originally got with the kit but was a simple task of measuring, cutting and fitting.


Here is the drivers side all finished.


I will just add that I didn't do all the carpeting in 1 session.  I had a few evenings where I spent and hour or so in the garage and a couple of weekend sessions.  I suspect in total I might have spent the best part of about 10 hours on it by the time I had messed about.

Also, just for information, I used the 500ml spray adhesive cans and got through 3 and a half cans of the stuff.  At about £10 a can and the tin of glue remover - I spent around £45!!  Bet not many people include that in their build costs!!

Anyway ..... on to the seats.  I have gone for the standard GBS seats.  They may not be the most comfortable and are only made of vinyl but at £165 for the pair, they are a real bargain.  I did explore other options but by the time I had chosen colour coded panels to match the car colour, I was looking at maybe £350 to £400 per seat!!  I think I may leave that for an upgrade at some point in the future.

So, I had already fitted the runners which was a simple 2 bolts per runner job.  Finding the holes in the seat to bolt in to was not straight forward, but I got there in the end.  Next job was to fit the holding bolts.  I use M8 x 30 hex bolts and this puts enough thread through the floor to be able to fit the nut to.  Anyway, I followed the GBS instructions on this (did you know there is a download section on the Kit Spares web site with loads of really useful bits of information? No I didn't either .... I think it must be a fairly recent addition)

Anyway, the order is bolt, washer, seat runner, washer, nyloc nut, to get the look below.  Then penny washer, carpet, floor, penny washer, nyloc nut.  I made the holes in the floor M9 just to give a bit of room for manoeuvre!


Here is the driver's seat fitted.


Just repeat for the other side.


With the interior very close to finished, I turned my attention to the bonnet.  I don't need to cut the bonnet for the air intakes as I have the plenum chamber that stays withing the confines of the car, but I do still have to cut the hole for the exhaust.

First thing was to take some measurements so I could sketch it out on some card.


Here it is cut out


I then trial fitted this and found it caught on the no 3 pipe, where you can just see an arrow.  I re-sketched the line to miss this.


Which gave me this.


Here is is sitting over the exhaust pipes and allowing space for some trim.  I don't think it needs to be any more complicated than that.


I still need to transfer this on to the bonnet and cut the bonnet, but I can't do that until the bonnet is fitted, so that is the next thing for me to move on to.

Sunday 13 November 2011

Head Lights, Manifold and Carpets (part 1)

The first job with the headlights is to remove the wiring that comes with it and replace it with wires to include the side lights, as supplied by GBS.  The new wiring won't fit through the existing bolt with the hole down the centre, so a new hole has to be drilled in the back of the head lamp bowl.  This shows where I drilled mine, but I forgot to take a picture of the hole.  It needs to be about 15mm wide so the grommet fits correctly.


The light unit then needs to be wired up.  All very straight forward, I hope!!


Finally fit the light unit into the bowl and do up the exterior clamp.  Then fit to the car as below.

Now repeat the same for the other side and you end up with the following:


I then decided to trial fit the manifold just to see how it would fit.  I took the opportunity to roll the car out of the garage to take a few progress pictures.  It also gave me a chance to tidy the garage and give it a good sweep out!


Next job is the carpet.  It really feels as though I am on the home stretch now I am starting on the interior trim, although I think the factory fit the carpet quite early on in the build process.  I have bought the proper factory carpet set where all the carpets are laser cut ready to go.  They are designed for the latest chassis design so there are a couple of holes in the wrong places, specifically for the seat belt points which are further forward on the newer chassis.  Here is the kit roughly laid out.


I decided to start small, so set about the boot.  First job was bond the infill panels in place and screw the diff plate down.


First panel was the seat back panel.  I covered the cross member with tape to protect it from over spray of glue as the spray adhesive can go everywhere if you are not careful.  Anyway, a simple job of applying adhesive to the carpet panel and to the aluminium, wait a minute for it to start to go tacky, and then put the carpet panel in place.  It did take a couple of attempts to get right, but it looks good now.


I then moved on to the corner pieces.  These were very cleverly cut so they fold round the 2 sides of the corner very well.  I used the same process as above to stick it in place.  Then just repeat for the other side.


The last panel to stick in is the one that goes round the back.  This is a longer piece and I realised it was not going to be easy to fit it in place using the same method so I had to tackle this one differently.  First I dry fitted the panel, making sure it lined up with the hole for the fuel filler (which I had to remove).  I then clamped it in place in the middle of the panel and peeled one end of it back.  I carefully applied adhesive to the body of the car and the carpet, left it a minute and then rolled it back in to place, smoothing it out as I went.  I then removed the clamp and repeated for the other half.  It was a bit fiddly doing this in the confined boot space and I did manage to get some adhesive over spray on to some of the freshly fitted carpet.  I am hoping it won't show when it is dry or that I can get it off.


Finally, the bottom piece of carpet is laid in to the boot.  This is not glued down so it can be removed to give access to the diff panel and the fuel sender as required.


Finally, I fitted the four floor pieces.  This was straight forward although the panels did need a small amount of trimming to make them fit.


Next time I will move on to the tunnel, sides, foot wells and back panel.

Friday 11 November 2011

Pedal Box and Water Hoses

I decided to fit the pedal box to the scuttle using rivnuts and bolts, so that the scuttle can be removed if needs be in the future.  I had already made up the pedal box and fitted the cover with rivnuts and bolts, so the basic box was ready to fit.  This was a simple job of drilling 4 holes in the pedal box where it joins the scuttle, offering it up and marking the holes on the scuttle, then drilling and fixing the rivnuts.  Once fitted it is nice and secure.  I am going to rivet the bottom edges of the pedal box later.  Whilst doing this I also drilled the battery panel ready to fit, although I have not done the final fit yet.  Here it all is.


Next, the water hoses.  Here is what you get in the water hose kit.


The following pictures show where they all go.  Top hose.


Bottom hose at the radiator join.


Overflow pipe and also you can see the bottom hose where it joins the water pump.


Finally, a progress shot.  It is really starting to take shape now.


Thursday 10 November 2011

Starter Motor, Plenum and a bit of Tidying

First job of the day was to fit the starter motor.  Fairly simple, just three bolts and it is in, but because I didn't fit it before the engine was installed, it is a little fiddly.


Next job is to fit the wires.  Although GBS have a diagram of what wires come in the battery set, it is not 100% clear where they go.  I think I have got it right.  The pink wire to the solenoid had a push connector on it but that would never have stayed on the terminal so I changed it for a spade connector and bolted it to the lowest of the 3 connectors.  The 2 positives, 1 from the fuse board and the other that goes to the alternator I bolted to the upper right hand connector and the earth the upper left hand connector.  This was then bolted to the chassis.  Hopefully this is right, but I will double check before trying to start the car!!


Next I did my first bit of tidying of the day.  All the wires running round the chassis needed holding in place so I used lots of cable ties and tidied things up a bit.  I was able to plug some of the engine loom connectors the their appropriate places and plugged in the washer bottle pump.  The water pipe for this was run along with the cable so it appears up under the dash to connect to the washers when they are fitted for the windscreen.

Next I moved on to the iPod holder I started yesterday.  I made a simple cradle, using the same principal as I had for the Sat Nav, only this time I only bonded it in place, I didn't use rivets.  Here is is from the back.


And this is what is looks like from the front.  And just in case you were wondering, the album playing is the first solo David Gilmour album from 1978.


Time to fit the oil pressure sender.  Here is what you get.


First job was to remove the existing one from the Zetec lump.  Because of its location, you can only get it undone with a ring spanner, but did I have the right size, did I 'eck as like!!  It is a 24mm so off to Halfords I went and £9.99 later the old sender was off.  Now to fit the new sender.  First fit the brass adaptor to the sender and then screw it in.  Not too tight, but tight enough.  I have marked the contact names for easy reference later (G and WK).  For reference, if you are using the GBS plug 'n' play loom and ETB guages, G is for Gauge and has the white wire and WK is for Warning Light and has the yellow wire.  There are also Black and Brown wires but these are earths and not needed with the ETB sender.


The water temperature sender fits in to the end of the Raceline water rail.


Next job, the plenum.  It is a little bit fiddly to get the bolts in and done up and those with smaller hands will benefit, but once in place it looks good.


It still isn't finished as I have fitted the injectors but one of the fuel pipes still need coaxing in to place.  Looking at some of the factory images, I think I have a bit of pipe bending to do.