Mirrors
Nothing fancy here, I just wanted something a little smaller and racier looking so I bought a pair of these.

The arms are made from billett aluminium so they are very light.
Wind Deflector
A friend of mine, who drives a Westfield, has a wind deflector on his roll over hoop and swears that it make a difference and cuts down wind buffeting. It is not something that you see very often on 7 style cars so I thought I would try it for myself to see if it made a difference.
His is made from some sort of mesh but I didn't have that luxury so I bought some exterior perspex from B&Q to have a go with as I still wanted to be able to see behind me.
I started by making a cardboard template and checking that it fitted. I wasn't after perfection at this stage as it was just an experiment.


Once I was happy with the template, I traced the shape on to the perspex and used a fine blade on a jigsaw to cut it out.


To fit the wind deflector I cut some small holes in a line and elongated the holes to make a slot to pass some velcro through to wrap around the roll bar.


Once done, I took the car for a run out. I now know why you don't see these added to many 7 style cars. It makes little or no difference at all, in fact, I am sure it was a little worse. I soon stopped and removed it and carried on with my run out without it fitted. It might work better when the half hood is fitted, to make the cabin a bit more snug, so I may just carry it with me and try that at some point. For the time being it is not fitted.
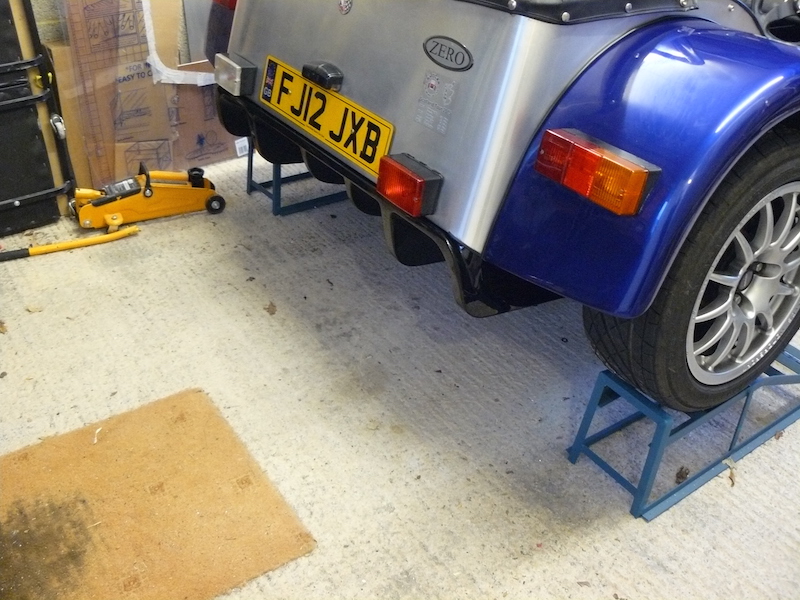
Rear Diffuser
When I bought my kit, I thought about the rear diffuser but didn't bother at the time. Over the years I have seen cars with them fitted and decided mine would look good with one as well. I didn't want it to stand out too much so went for 'Panther Black' gel coat finish to be a bit more subtle than a colour matched one.
I looked on line to see if I could find any fitting instructions but to no avail, so I thought I would update my blog accordingly, so this is how I fitted mine.
The diffuser came in a big box and was very well packed. I was careful how I handled it as I didn't want to scratch it in any way (PS, I failed and it now has some marks on it!!)


The diffuser is fitted to the back of the lowered floor by means of an angled bracket that goes across the width of the car. This is the bracket.

First thing I had to do was to find a way of getting the back of the car off the ground to work on it without using a trolly jack and axle stands. I bought a pair of cheap ramps from Machine Mart for £32 and they do the job nicely.

I then marked up on the diffuser where the holes on the mounting bracket were.


The holes on the diffuser were drilled out to accept M8 rivnuts. I got up to a 10mm drill bit then used a step bit to open the hole up to about 11mm.


The back of the diffuser is held in with 2 rivnuts on either side on the tabs that drop down from the side panel. This answers the many questions of what these are and what they are used for. The hole to the left was actually too high up and missed the diffuser sides so I ended up adding another one halfway between the 2.

The front bracket is fitted to the back of the lowered floor by way of 4 bolts. I could have used rivnuts here but chose normal nuts and bolts. This is not easy when there is only one of you!


These are the 2 rivnuts on the side of the diffuser.

And finally everything was bolted in place. As is always the way, 3 of the five bolts at the front went in fine and the other 2 cross threaded, despite all the careful measuring. I perhaps should have made the M8 holes in the bracket a little larger to give some 'wiggle room'. Grrrrrr!!!! They won't come out but could cause trouble if ever I want to remove the diffuser for any reason.
Here is the finished job.
All in all, it probably took me the best part of 6 hours to fit over 2 days, although I am sure it could have been done in a lot less had I had some helping hands.

Now I wonder what the next upgrade could be???