
Even the hot air couldn't get it neatly round a sharp bend so I resorted to 2 pieces of trim and a 45 degree angle to make up the joint. Looks OK and you only see it if you are looking for it!

On then to the seat belts. Now it always amazes me that these need to have trim on them at all but you must build to the IVA and if the inspector can get his sphere in there he will check for a radius. This is rubber trim held on with super glue.

Whilst I had the super glue out, I went round the rest of the trim around the inside of the boot and made sure it was fixed. Nothing worse that seeing bits of trim hanging off a new car.
Also wired up the front indicators. Now the GBS wiring diagram shows separate wires for the cycle wing indicators but I couldn't find them so I double them up with the main indicators. Hopefully that will be OK.
Earlier in the day I had applied a single little blob of Sikaflex to the four ends of the cycle wing brackets. This held them in place so I could make sure they all lined up. Final job of the day was to fix the cycle wings in place properly. To do this I made up some right angle brackets and fixed them in place with more Sikaflex. They will cure overnight and then they won't be going anywhere!! If the cycle wings were up to the job I reckon you could almost lift the car with out them coming off.
Here are the brackets. They will be sprayed with underseal so they don't stand out so much.


I can apply trim and wire the indicators when it has all set.
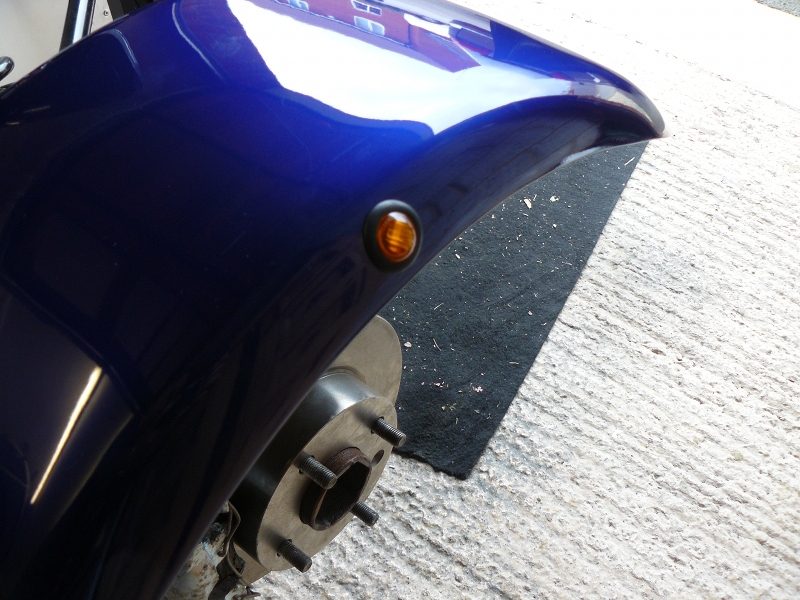
So fast forward to the next day and the cycle wings are firmly secured so the next things to do is to add the LED side repeaters. These are and IVA requirement to have an indicator at the widest part of the car. In the Final Push To IVA - Part 1, I showed how I had run cable through the cycle wing bracket. It was a simple job to wire the light to the cable and then use some Sikaflex to glue the cable out of the way. This is the finished job.

Next thing to do was add trim to the cycle wings. I used the same trim as on the nose cone and it was very easy to fit. It also look really neat and tidy.

All the holes for the for the suspension arms also needed trim applying to them. This was a bit fiddly but with a bit of patience and some super glue to hold it in place, it worked OK. There are still a few little things to do, but it is nearly all done now.

I could now move on to putting the car back together and plugging in all the wiring. Now if you have read through the entire blog (and thank you if you have!) you will know that I went for the GBS plug and play wiring looms and this is where they are worth their weight in gold. Once they were all connected, I connected the battery and turned on the ignition. Both fuel pumps, the fan and the washer bottle came to life, as did the warning lights on the dashboard. Good start. First job was to unplug the fuel pumps so as not to burn them out as I had no fuel in the tank. Next, unplug the washer bottle as that shouldn't be working all on its own. I left the fan for the time being.
This is the mess of me getting everything connected up.

I started to check things, and one by one, tick them off. Indicators first. the NS worked OK, but no cycle wing repeaters. Bugger. Now for the OS .... they were flashing a bit too fast and not working at all at the back. Muppet mistake. When I re-fitted the rear wing, I forgot to plug the light unit back in. With that sorted, the indicator worked, but as with the NS, the cycle wing repeater wasn't working. I need to swap the wire round to see if that cures it.
Side lights .... check. Fog lamp .... check. Dip beam .... check. Main beam .... check. Hazards..... check. Horn .... check. Instrument lights ... check ... wait, no, the tacho one didn't work. Again, my error, I missed one wire to earth. With that resolved, they all worked.
Next, power to the Sat Nav and iPod. Nothing. I think I was trying to be a bit too clever and a bit of re-wiring and a fuse later, they now have power.
The starter button doesn't work, but that can wait. I am not too bothered about that. If Simon or Ben can sort that when the car is at GBS then so be it, if not, I won't lose any sleep over it.
Next job was to get the dashboard fitted and the scuttle bolted down. Then I could fit the pedal box properly.
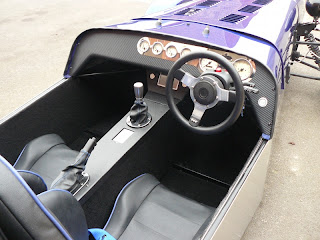
Fitting the dash was a bit fiddly, but it went in the end. I could then bolt everything down tight for the last time and fit the pedal box. Finally a bit of trim round the dashboard edge and it all looks like a proper job.
So fast forward to the next day and the cycle wings are firmly secured so the next things to do is to add the LED side repeaters. These are and IVA requirement to have an indicator at the widest part of the car. In the Final Push To IVA - Part 1, I showed how I had run cable through the cycle wing bracket. It was a simple job to wire the light to the cable and then use some Sikaflex to glue the cable out of the way. This is the finished job.
Next thing to do was add trim to the cycle wings. I used the same trim as on the nose cone and it was very easy to fit. It also look really neat and tidy.

All the holes for the for the suspension arms also needed trim applying to them. This was a bit fiddly but with a bit of patience and some super glue to hold it in place, it worked OK. There are still a few little things to do, but it is nearly all done now.

I could now move on to putting the car back together and plugging in all the wiring. Now if you have read through the entire blog (and thank you if you have!) you will know that I went for the GBS plug and play wiring looms and this is where they are worth their weight in gold. Once they were all connected, I connected the battery and turned on the ignition. Both fuel pumps, the fan and the washer bottle came to life, as did the warning lights on the dashboard. Good start. First job was to unplug the fuel pumps so as not to burn them out as I had no fuel in the tank. Next, unplug the washer bottle as that shouldn't be working all on its own. I left the fan for the time being.
This is the mess of me getting everything connected up.

I started to check things, and one by one, tick them off. Indicators first. the NS worked OK, but no cycle wing repeaters. Bugger. Now for the OS .... they were flashing a bit too fast and not working at all at the back. Muppet mistake. When I re-fitted the rear wing, I forgot to plug the light unit back in. With that sorted, the indicator worked, but as with the NS, the cycle wing repeater wasn't working. I need to swap the wire round to see if that cures it.
Side lights .... check. Fog lamp .... check. Dip beam .... check. Main beam .... check. Hazards..... check. Horn .... check. Instrument lights ... check ... wait, no, the tacho one didn't work. Again, my error, I missed one wire to earth. With that resolved, they all worked.
Next, power to the Sat Nav and iPod. Nothing. I think I was trying to be a bit too clever and a bit of re-wiring and a fuse later, they now have power.
The starter button doesn't work, but that can wait. I am not too bothered about that. If Simon or Ben can sort that when the car is at GBS then so be it, if not, I won't lose any sleep over it.
Next job was to get the dashboard fitted and the scuttle bolted down. Then I could fit the pedal box properly.
Fitting the dash was a bit fiddly, but it went in the end. I could then bolt everything down tight for the last time and fit the pedal box. Finally a bit of trim round the dashboard edge and it all looks like a proper job.

No comments:
Post a Comment