Sunday 15 January 2012

Clutch Cable

Today I started off by doing a few little bits of wiring.  The fan needed wiring as did the headlamps.  I realised I didn't have the proper sockets so just fitted the spade connectors for the time being.  I also did a bit of tidying of some of the cables to get them out of the way.  There is still more to do, but each time I do a few bits the list gets shorter.

On to the clutch cable.  There is a mounting bracket near the pedal that the cable passes through, well it is supposed to.  The reality is that connector that fits to the pedal won't go through the hole so a slot has to be cut in the side of it.  Thankfully I have an angle grinder so it was a simple job to put the slot in for the cable to slide through.


Here is the cable in place.


The clevis that fits to the pedal came without a pin so I had to fabricate one.  I took a stainless steel bolt, cut it down and drilled a hole for a split pin, as shown below.


Finally, a small V shaped notch has to be cut from the pedal to stop the cable pulling on its self.  Again, out came the angle grinder, and few seconds and a lot of sparks later, here is the notch.

Final job was to fit the cable to the clutch pressure lever and adjust the nut to take the slack out of the cable.  Once done, it was into the car to try the pedal.  It has no where near as much movement as my daily driver, but that is just the nature of the beast and something I will have to get used to.

Saturday 14 January 2012

Hole for Exhaust

Today was freezing in the garage so I didn't fancy spending too much time down there but I wanted to make some progress with the bonnet.

In a previous post, I showed the process of making a template for the hole that needs cutting for the exhaust.  First stage was to transfer that to the bonnet.  I had made some marks on the cardboard template and the side of the car so I could place the template int he right place to mark the bonnet.  Anyway, here it is marked out.


Next step was to remove the bonnet and cut the hole out.  This I did with a jigsaw with a metal cutting blade.  It is quite a nervous moment before you start, but you just have to be brave and go for it.  Remember that you will be fitting some trim round the hole so it is not crucial that it is 100% right .... 99% will do!!! Here it is cut and fitted back on the car.


Final stage was to refit the exhaust manifold and hope for the best.  I needn't have worried.


Next I did a bit of wiring to make up some smaller connectors for the brake fluid level switch and the TPS (Throttle Position Sensor) as the connectors on the loom were wrong.  That was it for today.  I hope tomorrow is a bit warmer as I would like to get some more done.

Saturday 7 January 2012

Nose Cone and Bonnet

At the end of my last post, I was not too happy about the fitting of the bonnet and nose cone.  I raised a post on the RHOCaR forum and got some useful help and advice.  Apparently, there is a new nose cone on the newer cars that fits as it should but I wasn't about to drop a few hundred pounds to get one.  First I had to see if I could resolve the issue myself.

First job was to try and establish some sort of datum to work from.  The only way to do this was to fit the bonnet without the nose cone and clamp it in place so I could see how high the nose cone needed raising.  I did this with the use of a couple of clamps as can be seen in the picture below.


Once secure, I re-fitted the nose cone using the bottom fixing only.  I worked out it needed to be raised by about 8mm to 10mm each side.  The only problem was I was doing this on my own so how to actually do it and hold it in place was another problem to overcome.  I made use of some cardboard strips and taped them together to make a block.  I started with 2 pieces and then went to 3.  I wedged them in un the sides of hte nose cone by the headlamp brackets and this was sufficient to raise the nose to the right point.  Some judicious use of masking tape and a pen and I was able to mark where the nose cone needed to be.  I was able to then remove the nose cone, un-clamp the bonnet and remove it before replacing the nose cone, resting on the cardboard blocks.  I then simply drilled new holes for the fixing bolts.  Below you can see the amount the nose has been raised.  By the time it has trim on it, it won't be so apparent.


With the nose now fitted and secure it was time to re-fit the bonnet and fit the catches to hold the bonnet on.  I devised a little guide tool to help me get the holes on the right place and also to make sure the catches were all positioned the same.


It was a simple job of marking the holes, drilling, removing the plastic covering and then riveting the catches in to place.  With all four done, it looks like this.


And from the other side.


I still have the edge trim to put on to it and some rubber strip, but I am reasonably happy with the finished result.

Next job will be to go round the car and start making a list of all the jobs that still need to be done.  There is still plenty to do but it will be good to start ticking things off so I can see how much closer I am getting to the end of the build.

Monday 2 January 2012

Dashboard and Bonnet Fitting

Firstly, a Happy New Year to anyone who is following this build or is reading for the first time.  I haven't had chance to touch the build for the last few weeks with one thing and another and then just when I get a couple of days off work, I feel like crap!  Man flu and all that .... oh well!!  Anyway, although it is cold out in the garage, I didn't want to waste 2 days so decided to see what I could get done today.

The first thing was to start to wire up the ETB gauges.  You may remember in the last post, I mentioned I had an instrument loom made for me by the factory so wiring up the gauges was very straight forward.  Here are the gauges fitted into the gauge surround, making sure they are in the right order.  


Next I put the dashboard over and lined up the gauges and clamped them in place.  I used a straight edge to make sure they were lined up correctly, that the wording on each was level, a bit anal I know, but I want it to be right and I know if it isn't it will really bug me!

Anyway, it was then a simple case of following the diagrams I got with the gauges and also the wiring diagrams I had from GBS.  It all made pretty good sense.  Only time will tell when I actually put 12 volts through them and fire up the engine as to whether I have done it right or not.

Here is the the finished wiring with the warning light module in place as well.


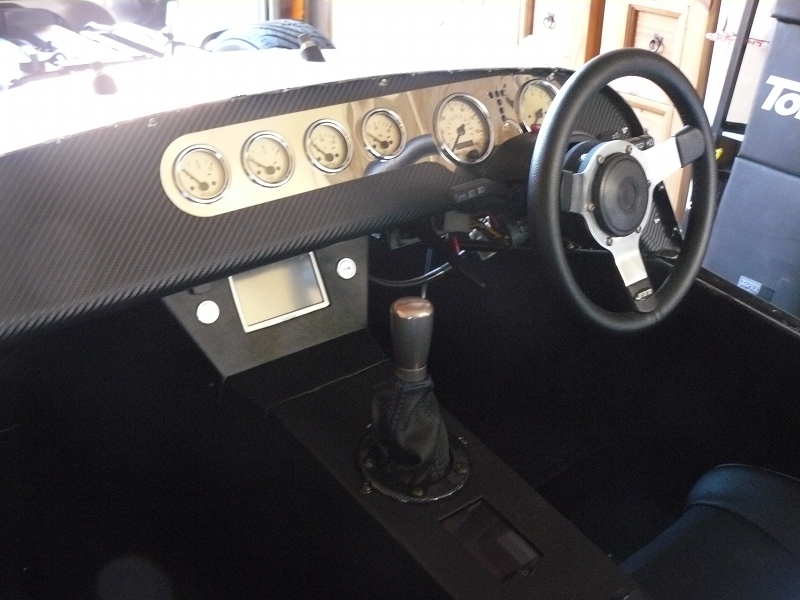
I just had to then see what it would look like fitted to the car.  Personally I think it looks pretty good.

Next job to tackle was the bonnet.  First I had to remove the exhaust manifold so I could trial fit the bonnet.  Now at this point I have to say that this is one of the things about the car I don't like.  The bonnet is rolled aluminium and really does not fit very well at all.  It will be better when it is all clamped down in place but at the moment it is pants!  When I tried pulling the sides in around the nose cone, there was a gap all the way round of between 5mm and 8mm and this just can't be correct.  Same around the scuttle.  Even with the sides pulled in tight, there are still gaps.  The picture below is without it pulled in tight, but you can get the drift.


I decided to walk away at this point as I didn't want to rush it and get it wrong.  It may be that it needs re-rolling and re-folding, but I don't have the tools to do that.  I am going to consult my son-in-law, who does body work and painting and get his help with it.  He may know someone who has the right tools to get the bonnet fitting correctly.  It would be a shame to ruin the car at this point with a badly fitting bonnet!  I will also consult the very knowledgable folk on the RHOCaR forum.