It would be very easy to just use a sucker and stick it to the windscreen but my main road car has one built into the dash so I thought I would see if it would be possible to do the same with the Zero. I decided that because of where the instruments will be on the main dash panel, it wouldn't be practical to fit it there so I looked at the other little centre consul that sits under the dash. This is normally used for the horn, fog lamp switch and 12v socket but I decided to see if I could fit my sat nav behind this.
I didn't want to break the unit apart to fit it so it would need to sit in some sort of cradle and be visible through the panel.
First thing to do was to take some measurements of the unit and decide how large the opening would need to be. I transferred these dimensions to the aluminium panel and cut it out. I first drilled 4 hole near the corners and then used a jigsaw with a metal cutting blade to get some really good straight edges and corners.

Next was to mark out and cut the cradle that the sat nav was going to sit in.
This .....

.... became this .....

..... which was then folded in the right places to become this.

Last thing to do was to use countersunk rivets to fix it in place on the back

Here it is with a trial fit of the sat nav.

Next thing to was to decide what button or switches I was going to have on the consul and where to position them. The rear fog swith and horn button are the 2 that are normally fitted and also the auxillary 12v socket. I thought about adding a starter button to match up with the 12v socket but there is a reason why I didn't. I needed a method of being able to turn the sat nav on and off and the only way is to reach my hand round the top of the consul and press the button. If there was a switch there, this would make this operation impossible and so the sat nav would be useless.
Once I had cut the holes for the switches and socket, all that remained was to cover it with vinyl. This is quite fiddly and the finished item is by no means perfect, but it does the job.

Below you can see the view from behind. You can just make out where I have cut the cradle lower on one side so I can get to the on off button and how a switch would get in the way.

This shows it better with sat nav installed. I have put rubber round the edges of the metal and also some strips inside the cradle to stop it moving or worse still rattling.

This is from the front with the 12v socket and rear fog light switch.

And finally, with the sat nav in place. I just need to fit the horn button, which I am waiting for.
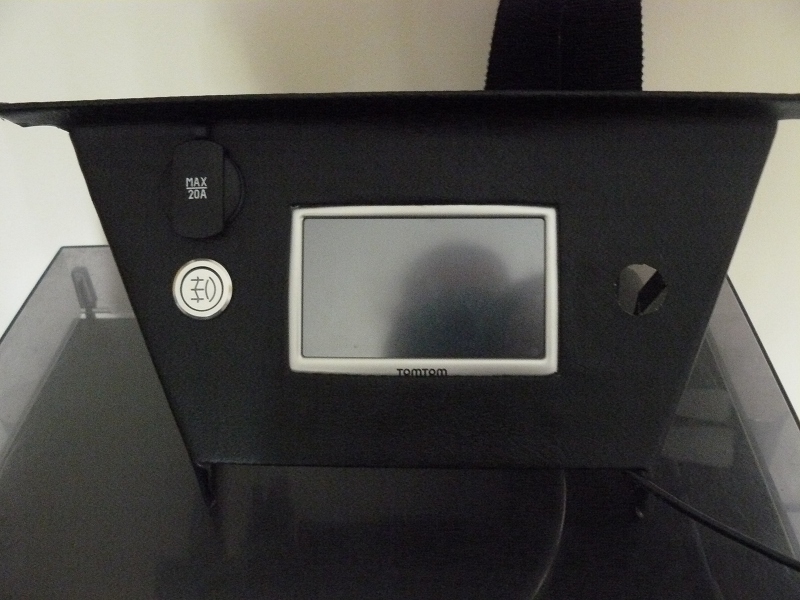
As for the power, I didn't really want the cable coming round from the nicely installed unit and plugging in the front, so I am adding a second 12v auxillary socket round the back that will be all hidden away, thus leaving the front socket for other things if requried.
So there we have it. Built in sat nav .... well sort of!!!
Edit - April 2012: Since getting the car on the road, I have found that the Sat Nav can't pick up a GPS signal where it was. See notes on this in the April 2012 post called 'Fixes and Tweaks'. I say this to save anyone any time if they were thinking of doing this mod.
No comments:
Post a Comment