The light unit then needs to be wired up. All very straight forward, I hope!!
Finally fit the light unit into the bowl and do up the exterior clamp. Then fit to the car as below.
Now repeat the same for the other side and you end up with the following:
I then decided to trial fit the manifold just to see how it would fit. I took the opportunity to roll the car out of the garage to take a few progress pictures. It also gave me a chance to tidy the garage and give it a good sweep out!
Next job is the carpet. It really feels as though I am on the home stretch now I am starting on the interior trim, although I think the factory fit the carpet quite early on in the build process. I have bought the proper factory carpet set where all the carpets are laser cut ready to go. They are designed for the latest chassis design so there are a couple of holes in the wrong places, specifically for the seat belt points which are further forward on the newer chassis. Here is the kit roughly laid out.
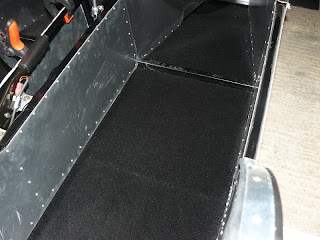
I decided to start small, so set about the boot. First job was bond the infill panels in place and screw the diff plate down.
First panel was the seat back panel. I covered the cross member with tape to protect it from over spray of glue as the spray adhesive can go everywhere if you are not careful. Anyway, a simple job of applying adhesive to the carpet panel and to the aluminium, wait a minute for it to start to go tacky, and then put the carpet panel in place. It did take a couple of attempts to get right, but it looks good now.
I then moved on to the corner pieces. These were very cleverly cut so they fold round the 2 sides of the corner very well. I used the same process as above to stick it in place. Then just repeat for the other side.
The last panel to stick in is the one that goes round the back. This is a longer piece and I realised it was not going to be easy to fit it in place using the same method so I had to tackle this one differently. First I dry fitted the panel, making sure it lined up with the hole for the fuel filler (which I had to remove). I then clamped it in place in the middle of the panel and peeled one end of it back. I carefully applied adhesive to the body of the car and the carpet, left it a minute and then rolled it back in to place, smoothing it out as I went. I then removed the clamp and repeated for the other half. It was a bit fiddly doing this in the confined boot space and I did manage to get some adhesive over spray on to some of the freshly fitted carpet. I am hoping it won't show when it is dry or that I can get it off.
Finally, the bottom piece of carpet is laid in to the boot. This is not glued down so it can be removed to give access to the diff panel and the fuel sender as required.
Finally, I fitted the four floor pieces. This was straight forward although the panels did need a small amount of trimming to make them fit.
Next time I will move on to the tunnel, sides, foot wells and back panel.


Nice build - loving the attention to detail.
ReplyDeleteKeep up the good work!
Thanks Chris, I appreciate the comment.
ReplyDelete