Friday 9 November 2012

The Upgrades Begin - Lighting

Since the last post, I have had presents!! The first parts to turn up were the Dominator headlamps.  I like the look of these smaller 4 inch units as opposed to 7 inch ones which I think are just a little too big.  This is all subjective, of course, and other people may disagree.  Hey, that is fine, it is what makes our cars so unique.

The next arrival was the mini indicators (not from a Mini but mini in size).  Here are the items laid out ready for fitting.


The next items to arrive were the new shock absorbers (or dampers).  These are the new ones that have been designed by GBS, working with Dampertech (www.dampertech.co.uk).  They are nitron filled and look the mutts!!


Anyway, I had a rare day off work and as the weather wasn't really conducive to a drive, I thought I may as well get on with the upgrades.  First job of the day way to get some head light markings from the old lights, so I would have something to line up the new ones with.  This was a simple task of shining the dip beam pattern on to the garage door and then put some masking tape where the line of the beams are.  This will at least give me a good starting point for the new lights.  I can take the car to get the lights properly aligned later.

So it was off with the bonnet and the nose cone first.


Then it was off with the old 7 inch lights.


I wanted to make use of the existing wiring loom as this included headlight and side light wiring.  It was a simple task of removing it from one light unit and adding it to the next.  It took a couple of attempts to get it right as far as the 4 way connector to the loom was concerned.  I initially only had main beam and nothing else, but a quick look at the GBS wiring diagram and I was on the right track, but not before I had blown the side light bulb!  A quick trip to the local motor factors and that was sorted.  I plugged the new light in and checked all the lighting functions and as they say, the jobs a good 'un.  I then repeated the process for the other side.  I won't actually fit the lights on to the car until some other jobs have been completed.  It stops them being knocked and also help with access.

I then moved on to the front indicators.  First job was to remove the old indicators.  This is when I noticed that there was some slight cracking and crazing in the fibreglass where they were fitted.  I think this is caused by the extra weight they carry and the extension bars causing them to bounce up and down a bit.  Not a lot I can do about this without having the nose cone repaired and re-painted, and that is not possible at the present time.

When fitting the new, very light weight, smaller units, I added a couple of penny washers either side of the fibreglass to add some extra support.  You can just see one in the image below and you can see that I have sprayed it blue so it is less obvious.  You can also see how much smaller these units are.  


Here are both fitted.


Final job was to finish the wiring inside the nose cone.  This was a simple job of joining 2 wires, solder and wrap in tape.


Final job of the day was to plug in the wires to make sure they worked OK, which I am happy to say, they did.  Again, the nose cone won't be put back on the car until other jobs have been completed.

Monday 5 November 2012

Winter Upgrade Plans

I think it is fair to say that a kit car is never really finished.  It may get to a point that you are happy with it, but is it really finished?  My car has been on the road for 7 months now and I have covered just over 1300 miles.  In that time, I have had to replace the exhaust (which has been covered in an earlier post) and also replaced a fuel pump and fuel filter, following some fuel starvation/dirt issues.

When I built the car, I had to build it to the IVA rules.  That is now a thing of the past, so I can start to change things.  I didn't want to take the car off the road in the summer (well, what summer we had) but now, as the winter months approach, I am planning to make some changes.

So what is being planned and why?

1.  New shock absorbers - I would like to be able to fine tune the suspension a bit better and try and get a more production car type ride, which I just don't think is possible on the GAZ shocks that came with the starter kit.

2.  Re-Shim the rear suspension - When the car went through the IVA, it was pointed out to me that I needed to add some extra shims (washers) in to the rear suspension, so whilst I am replacing the shock absorbers, I might as well do the shims.

3.  Head Lamps - The 7 inch lights are a little too big for my liking so I am going to fit smaller units

4.  Front Indicators - I had to fit larger indicators and extension bars to pass the IVA test, I would now like some smaller units.

5.  Quick Release Steering Wheel - I like the idea of one of these for extra security if I take the car away from home, especially as I am hoping to take it abroad.

6.  Finish wiring the Savage switches - I never got round to wiring in the lights on these switches so at night they light up.

7.  Get speedo working correctly - I have never been happy with the speedo sensor so I am going to try and get it working correctly.  There are a few option to how I might do this.

I have a few other ideas of things I would like to do, but I haven't decided fully on them yet so I won't mention them in case they don't come off.

So there we go, that should keep me busy for a few weeks.  First thing to do is to start ordering the parts I need and then start to take the car apart.  I just want to leave it a bit longer, just in case we have a warm spell and I can get another couple of blasts out in her before the work starts.  Yeah, who am I kidding!!!

Saturday 13 October 2012

How Old is Too Old?

It is a simple question.  How old is too old to enjoy a ride in a kit car?  Well, my father came to visit me a week ago and decided he wanted a ride in the Zero.  He is 82 years young!  He always amazes me with what he gets up to.  He lives in a retirement apartment and often complains there is nothing to do there because, to quote, 'it is full of old people!".

Anyway, I took him out for a short 20 minute blast and he loved it.  He struggled a bit to get out, but then sometimes so do I, so nothing to be ashamed of there.

Here he is before the blast.


Just goes to show, you are never too old.  Thanks pops!

Fuel Woes

As mentioned in the last post, the new exhaust had been fitted and I was ready for a trip up to Donnington Park for the newly resurrected Donnington Kit Car Show.  It is about 100 miles from Gloucester to Donnington and about an hour an 45 minutes taking the motorway route.  This is not the nicest of routes but once I was on the move it was actually quite a relaxed drive.

I had covered about 80 miles when the car started to feel a bit hesitant, the definite symptoms of fuel issues.  I limped on until I found a convenient exit and found a lay by to pull in to.  First thing I noticed was that the fuel pump sounded laboured, which was a bit odd.  I took the opportunity of a quick pit stop for myself and let the car cool down a bit, in case it was a bit of an over-heating issue.  After about 5 minutes, I started her up and she seemed to be running better, so I set off again.  She still wasn't running right, but I was able to get to Donnington.

I went in to the main hall and found Richard Hall of GBS and had a chat with him about the issues.  This wasn't really very fair as he could only listen to my version of the symptoms and not experience them for himself.  Anyway, we discounted the fuel pump at this stage as he said they had not had one fail, even on the demo car which has had some real abuse over long distance and on the track.  He was pretty sure it was dirt in the system.

A post on the RHOCaR forum also agreed with this and so 2 new fuel filters were ordered.  The first is a low pressure filter that is in between the tank and the low pressure pump at the rear of the car.  The second is a high pressure filter to go in between the high pressure pump and the injector rail at the front.  This is new, as I don't currently have a filter here.

Once the filters had arrived I set about fitting them.  This is when I had another thought.  What if the Facet low pressure pump was duff?  Fortunately, I live quite close to Castle Coombe so was able to pop down to Merlin Motorsport and pick up a new one.  I got one with a slightly higher fuel rate in case that was also an issue.

Once home I set about fitting it all.  First thing was to stop the fuel coming through from the tank and I purchased some pipe clamps from Machine Mart for the job.

Health and Safety Notice:  With the car finished, I had no option but to get the car up on jacks and work on it on my back underneath it.  There is not a lot of room to work in and I ended up with fuel on my hands, up my sleeves and on my face.  Whilst trying to undo some jubilee clips I dropped the spanner and it hit me in the face.  I know it is all common sense, but it can't be stressed enough to take care when under a jacked up car.

Anyway, back to the problems.  When taking the old fuel pump off, I found that the mounting rubbers had come apart and the pump was only held in place on one side.  This was caused by a fuel leak and the petrol melting the glue that held this bobbin together.

I proceeded to fit the new pump but was told by the sales guy at Merlin that the brass fittings for he fuel pipe were tapered so could just be screwed in.  WRONG! Once fitted like this, there was a fuel coming out of the joints and dripping below the car.  Not much, but enough to cause vapour fumes and a mess.

I took it all off again and this time fitted the brass fittings with PTFE tape.  Voila, so far no leaks.

A quick run round and it all seems OK and the fuel issues seem to have gone away.  I am not sure if it due to the new pump on the back, but for now I am happy.

Friday 31 August 2012

New Silencer

My last post was back in May and since then, I must be honest, I have not done much to the car and I have not driven it much either.  Since the car hit the road in April, I have covered about 900 miles, which is totally down to the poor weather we have had this year.  I have managed the odd trip out but nothing really significant.

If you look back at my earlier posts, you will see that I had an issue with the exhaust bracket coming away from the chassis.  This meant that the silencer was floating in the air for about 10 miles until I got home.  At first I didn't think that any damage had been done, but on the last couple of runs out, I had noticed a rattle in the silencer can.  Coming back from a local car show recently, I noticed that the exhaust was blowing a little.  Once home, I was able to see that there was a fracture around the can where the catalytic converter had been welded in.  You can see it at about 8.00 o'clock on the image below, on the weld.


When I took it off the car, I could really see how bad it was.


A quick phone call to GBS and they confirmed that they would cover it under warranty, a great result.  Only issue is that I need to get it to them.  As it would happen, the Donnington Kit Car Show is happening this weekend and I am going to go and they are going to be there.  They have agreed for me to take the system up there and they will take it back to the factory, re do the weld, or replace what needs replacing, and ship it back to me.

I had already decided to change the cat/silencer combo for one of GBS's new stainless steel silencers.  Not only are they quieter, which I am happy about, they are re-packable, which is a bonus.  Here it is, along with the required bracket.


First job was to remove the old silencer and mounting bracket.


Next was to trial fit the new silencer.  I found it was a little bit too long so I had to cut an inch off the manifold pipe.  Once that was done the silencer fitted about right.

I then had to drill 3 holes for the new bracket to be fitted.  I marked it all up on the outside of the car and could drill through the side of the lowered floor but I couldn't get the car high enough to get a drill underneath to do the other holes.  I had to improvise and make a template and drill through from the inside.  This meant removing the passenger seat.


Here are the bolts from the inside.


Here is the bracket fitted from the outside.  It is a nice piece of work.  You can see that the silencer doesn't quite sit in the bracket but it only takes a little bit of pressure to push it in place and pull the spring clip over the top to secure it.


Here it is fitted.


The car is definately quieter, but is still has the nice racey sound when pushed and a noce deep rumble when idling.  All in all, I am happy with the result.

I had also just re-taxed the car and decided to buy a new tax disc holder, colour coded, of course!


The car is all ready now for a trip up to Donnington.

Wednesday 16 May 2012

GBS Photo Shoot and Stone Guards

Whilst my car was at the GBS factory, Richard asked if I would mind if they took it to take a few pictures of it.  Of course I agreed, as long as I could have some copies.  Now, as well as working at the factory, Ruth Hall is also a professional photographer (http://www.photographybyruth.co.uk/) and she ended up taking about 150 pictures, which she kindly let me have digital copies of.

Now I think it is fair to say that I am rather proud of the finished Zero (are they really ever finished??), so couldn't resist putting a couple of the images up here.


You don't see many images of these types of cars with the roofs up, so here are a couple.


Added to this, GBS have used an image of my car in the new magazine advert and also on their Zero flyers.  To say I am chuffed is an understatement.

Stone Guards

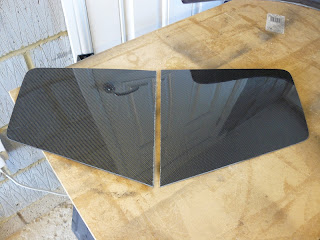
One of the jobs I hadn't done before the IVA was to fit the stone guards.  I didn't want to fit the stainless steel ones from GBS so had some carbon fibre ones made up for me.  They were made by a chap called Julian Eisel and his company, Aerodynamix (www.aerodynamix.co.uk) who mainly make Westfield parts but they were able to make these for me from the originals.  He has made a cracking job of them.


First thing I did was to add a bit of extra carbon film wrap to the bottom of the wheel arch for a bit more protection.  I then marked out and drilled the stone guards at 2 inch intervals and then drilled the holes in the arch.  You can see the holes for the stone guard but also the pitting in the paintwork, and this is after 400 miles only.  They take quite a battering.


Here is is the stone guard fitted, using black rivets.


And then finally fitted to the car.  I must say I am happy with the results.


I am not sure what else I have left to do on the car except drive it.  Having said that, since I picked it up from the factory, the weather has been pretty poor so I am hoping for a change soon.  Perhaps any new entries to the blog will be about driving the car and not just looking at it in the garage!!

Sunday 15 April 2012

Spanner check, broken exhaust bracket and some more trim

I was returning from a run out yesterday when I started to hear a knocking and scrapping noise.  When I finally found somewhere to pull over, I found that the exhaust mounting bracket had come away from its fixings.  I had no option but to continue home and took it very carefully for the last 10 miles or so.

Once home I was able to survey the damage.  This is what it looked like.


If you look closely enough, you can see that the rivnuts have pulled out and some of the aluminium has broken away.  On closer inspection, I could see that when the rivnuts were fitted, they only secured themselves to the aluminium body panel that was resting on the chassis rail and not in to the chassis rail itself.  This wasn't strong enough to take the abuse that an exhaust bracket is likely to give it.

In the picture below you can see one rivnut still attached to some body work!


The resolution to this was to cut away the excess body work to fully reveal the chassis rail underneath.  I need to get and fit 2 new M8 rivnuts and then bolt it all back together.

So the moral of this story is to make sure that the rivnuts are clamped up against something solid and not just body work!

Something I had had sat in the garage since collecting the car was the trim piece that runs along the top of the rear panel and hides the boot cover edge and the edge of the carpet.  I got this from GBS and thought it was an aluminium one and was going to cover it in either leatherette or carbon wrap.  When I took the plastic wrap off it, I found it was a stainless steel, so I decided to leave it as it was.  It is simply bonded in place at either end with Sikaflex.


Here is the finished job with the harnesses fitted back on.


I also went round the car and did a spanner check.  I have done 250 miles now so it needs checking over.  There were no major finds, in fact most nuts and bolts were still as tight as the day they were fitted.  Even the nut in the driving seat!!!

Monday 9 April 2012

Fixes and Tweaks

So, the car has been home less than a week, and I have already started to do some fixes and some tweaks.  First thing to change was the front number plate for a smaller one.  The reason is simple.  Where I live, there is a small ramp leading up to the garage and the bigger plate catches it, this one won't.  I know I will have to swap it back for MOT in 3 years time, but never mind.  Hopefully it won't catch the attention of the boys in blue as, strictly speaking, it is  not legal!


Next job was the Sat Nav.  To be perfectly honest, I thought I was being clever, building the Sat Nav in to the centre consul and it looked pretty good.   However, there is no point having it there if it can't get a GPS signal!!  There are options.  You can purchase a re-radiating booster that acts as the GPS aerial and the Sat Nav then picks up the signal from that.  It means something else plugged in to the 12v system and I would have to find some way of hiding the cables so it could get the GPS signal but not look naff.  It is an option that I can re-visit at some point, but in the mean time, I have had to move it.  I have made up a simple blanking plate to cover the hole.


The Sat Nav is now attached to the windscreen, the same way most people do.  However, I don't like trailing wires, so I have run the power cable down behind the dashboard to keep it neat and tidy.  Whilst in there, I replaced an earth cable that had come off the rev counter, so the back light on that now works as it should. I wonder how that got through the IVA?


Next job was the speedo sensor.  I had used 2 magnets, as supplied by ETB, for the pick up sensor, but it turns out that ETB had sent me a Hall Effect sensor, and they don't like magnets.  They will work, but they prefer the bolt head method.  The effect I was seeing was that the speedo worked OK up to an indicated 70mph, but if I went above that, the speedo shot up to 130mph, which I clearly wasn't doing.

Anyway, the fix was to remove the 2 magnets and then move the sensor to act against the 4 bolt heads holding the prop shaft to the diff, thus creating the required pulses.  I had made up a bracket to hold the sensor over the magnets so had to do something with that.

This is the way it was.


This is what it looks like now.  It is not pretty but it was the best I could do in the tight confines of space!! I was able to get in to the mount and use a pair of mole grips to bend one of the sides down in to the right place.  Some careful adjustment of the height of the sensor is then required so that when the prop turns, the LED in the sensor lights up as it passes the bolt head.


Next job was to re-calibrate the speedo.  You can get full instructions from ETB on how to do this, but the number you need for the pulses is 013021.  I managed to get it to 013020 as for some reason it didn't allow me to change the last digit.  Next job will be to get the car out on the road and try and test it against the speed showing on the Sat Nav, which is another reason for mounting it where I have.

Whilst the car had been sat in the garage, the rear number plate decided to part company with the rear panel.  It was held on with double sided tape but the wet weather on the journey back had got in and it had come unstuck.  I was lucky it waited until it was home to fall off!!  I have now held it in place with a couple of self tappers, although I might go a step further and add rivnuts.

Working down my list of jobs, next was the ride height.  As mentioned above, there is a small ramp leading up to my garage area and the car bottomed out as I drove in.  Looking under the car, I can see that I have about 4/5mm of thread on the seat mounting bolts, so the first task is to save my self that by cutting them off.  The pictures are a bit blurred, but you can see the before and after.


With these duly cut (which was not easy with the car already being so low to the ground), I moved on to the actual ride height.  The car is set up at the factory as 120mm from the floor to the lower chassis rail at the front wishbone and 130mm to the same point just in front of where the rear wing meats the bottom of the car.  Checking this, it appears to be at 110mm and 120mm, so would appear to have settled a bit.

I found an old bike C spanner and was able to turn the the suspension adjustment ring.  I didn't take exact measurements, but it appears that 1 full revolution on the spring, raises the height by about 2mm.  I did 4 turns either side, so the back is now at about 128/130mm.  I still need to do the front but I need to wait for a proper C spanner as the bike one is not really suitable.  E-bay to the rescue, although I will have to wait.

Stone Guards

I am really upset that the nice new paint work has been pitted with little stone chips on the leading edges of the rear wings.  The number is quite amazing in such a small amount of time.  I need to consult with my paint expert to see it is is worth treating them first or just adding the stone guards I have had made.

I have also ordered some clear vinyl paint protection material, to try and help the paintwork last a bit longer.

More fixes will follow as I do them.

Wednesday 4 April 2012

IVA Fixes

IVA Fixes

I have been asked if I can detail the fixes that the factory have made for me to get it through the IVA process.  First off let me say that Simon at GBS was brilliant.  He does all the IVA work for GBS, with help from the other guys and has, to date, put through around 70 cars and works closely with the testers at the Nottingham test centre, so what he doesn't know about  the test isn't worth knowing.

I would also add that as long as you build for the IVA and not for yourself, and have a PDF copy of the IVA manual to refer to when ever you are in doubt, you won't go far wrong.  If that doesn't help, and the blogs and forums can't help, ring the factory.  They want you to pass and be on the road as much as you do, it is not in their interest to have part built cars in garages.

So here are the fixes:

1. Fit IVA compliant steering wheel - remove after test - the old Sierra one will do
2. Fit IVA compliant wing mirrors - remove after test.  My mirrors will be fitted to the windscreen.  You must have the correct field of vision behind you (see the manual).
3. Fit centre mirror - remove after test as you really can't see much through it.
4. Mark heads of bolts not fitted with a visible locking device to confirm they have been fitted with Locktite.  Best to use paint or a permanent marker pen, as long as it is clearly marked.  You may get away with TipEx but as this is not really permanent, it may be best to avoid it unless you know the test centre will allow it.
5. Fit headlamp bolt protection - You can see there is a nut cover and some tubing to protect this.  The actual fitting rod could also be cut shorter to help here.  You can also see the mounting bracket trim going all the way round the end of the bracket.  Doesn't look nice, but has to be done.


6.  Apply some extra trim to the rear panel as you can see on the corner.


7. Apply extra protection to the wing stay bracket. nut covers to the flexible brake pipes.


8. A small amount of trim to a square edge on the callipers, because that is radius tested too!  NB:  Not all calipers will needs this.


9.  The red and black fuel pipes were too long and needed shortening so there was more flexibility to secure them and route them correctly.
10.  Some of the pipes at the rear of the car needed to be secured to IVA standards.  For example, do not cable tie the brake pipe to the suspension arms.  You can use a cable tie round the suspension arm, then pass the cable tie through some tubing and then finally attach the brake cable.  It means it is attached but has some movement to it.


Same with the fuel pipes.  They need to be secure but have some movement.


11.  Added some armour to the indicator wires and bonded the wires to the inside of the  nose cone so they don't touch the radiator.

As for the non IVA fixes, Simon found a few other things that should be watched out for.

1. I had wired the starter motor up wrong and had incorrectly wired the earth. Rookie mistake!
2. The steering rack was too low and the suspension bracket was digging in to the off side gaiter.  If you use the standard steering rack clamps that GBS supply, this shouldn't be an issue, but you need to be able to move the steering rack to adjust the setup.
3. The suspension needs re-shimming.  The washers I have used as spacers are not big enough as the need to cover the face of the neoprene bushes to help prevent them wearing out.
4.  Also make sure all bolts are long enough to protrude several threads beyond the locking nuts.
5.  Watch the spacing on the pedals.  The newer pedals have been re-designed to give a bit more space between them.

I will add any more if I remember them.

Tuesday 21 February 2012

Collection and Delivery To GBS

The car is as complete as I am going to get it, so it is off to GBS for them to do some final little jobs and for its check over and IVA.  So first off, why have I chosen this route?  Well, I could very easily book my own IVA test and do all the paper work and hope that everything was OK but, for me, and this is only a personal preference, I wanted the peace of mind of knowing that the guys who build these cars everyday will check mine over, set up the suspension, do the tracking, get the engine running so it meets the emission standards and generally give the car a good shake down.  Now don't get me wrong, they don't do all this for nothing and by the time you add in the transport costs, it is not cheap, but I think it is worth every penny.

So I arranged transport with a local company called ARC Recovery.  They have a good track record of moving everything from vintage cars to Bugatti Veyrons.  If they are good enough for the likes of Bugatti, Bentley and Aston Martin, they are good enough for my GBS Zero.  The other advantage is that the truck is covered, so no need to worry if the heavens open on the way up there!(and it is forcast!!)

Before the car was collected I took the opportunity to get some pictures.


Then it was time to load up.


Ground clearance was nearly an issue, but but it went in.  Remember that I haven't set the ride height yet.  I really hope I can get in to my house as that has a small incline that I might ground on.  Oh well, only time will tell!


An finally loaded and secure.  Next stop GBS.


And here she is (yes, it is a 'she') safe and sound at the factory.  I was very flattered to have some very nice, positive comments about the car from the guys there, which I was very chuffed about.


Next time I see her will be in about 3 weeks, I hope, when she will be IVA'd and registered for the road.  I will have to be patient but I think these are going to seem like the longest 3 weeks of my life!!