Now you may notice in the picture below that there is rather a lot of over spray and mess on the carpet near the bend in the chassis near the gear lever (there is some in the boot as well!). Well fear not, my kit building chums, help is at hand. You can buy a can of glue remover from Homebase and it cleans up all the excess glue, wet or dry. It is great stuff and I have ended up using a fair bit of it!!

I repeated the process for the other side in exactly the same manner and then moved on to the rear panel. I thought about fitting one side then folding half over and doing the other, but in the end I fitted it as 1 big panel. It takes a bit to line it all up, but once there, it looks good.

Next job was the foot well ends. I had to mark out and cut holes for the bolts holding the high pressure fuel pump, but other than that, it was straight forward. Same on the passenger side with the bolts holding the washer bottle.

With the tunnel sides now carpeted, I couldn't resist fitting the tunnel top panels. Now this may be a little over the top, but hey, who cares, but I have painted the hex bolts that hold the panels in place black, so they blend in with the carpet and vinyl a bit better.

Here is the rear panel. I ended up having to trim this down a bit to get it to fit correctly, but it looks OK.

Here is the main centre panel with the iPod fitted and working. I plugged in the power cable and the headphone extension cable and checked it all worked and it did. Job's a good 'un! I have ordered some gaiters for the handbrake and gear lever so that will help finish things off nicely.

Back to the carpeting. Like the tunnel panels, the crescent panels had to have new holes cut for the seat belt mounting points but again, fitted easily enough. There is excess material that has to be trimmed afterwards, but that is no worry.
And the other side.

The final piece to fit was the foot well side. This had to be cut from the roll of carpet I had originally got with the kit but was a simple task of measuring, cutting and fitting.

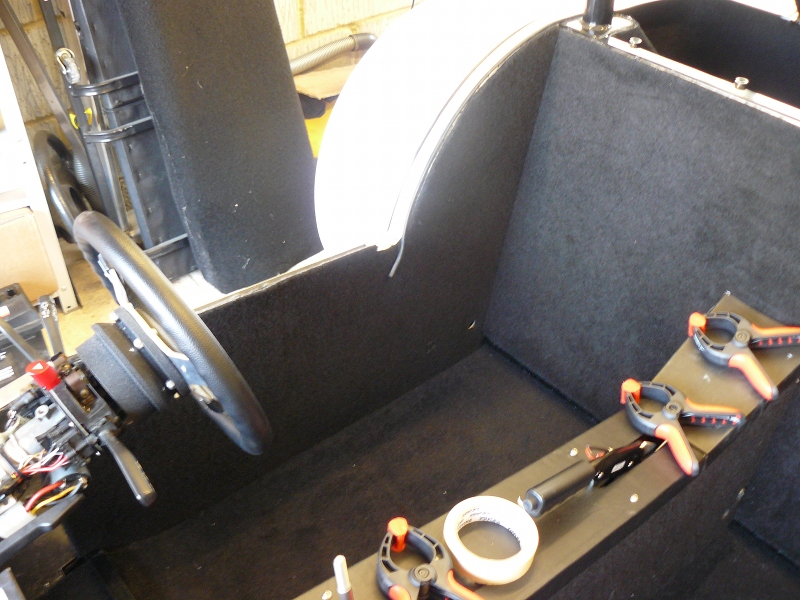
Here is the drivers side all finished.

I will just add that I didn't do all the carpeting in 1 session. I had a few evenings where I spent and hour or so in the garage and a couple of weekend sessions. I suspect in total I might have spent the best part of about 10 hours on it by the time I had messed about.
Also, just for information, I used the 500ml spray adhesive cans and got through 3 and a half cans of the stuff. At about £10 a can and the tin of glue remover - I spent around £45!! Bet not many people include that in their build costs!!
Anyway ..... on to the seats. I have gone for the standard GBS seats. They may not be the most comfortable and are only made of vinyl but at £165 for the pair, they are a real bargain. I did explore other options but by the time I had chosen colour coded panels to match the car colour, I was looking at maybe £350 to £400 per seat!! I think I may leave that for an upgrade at some point in the future.
So, I had already fitted the runners which was a simple 2 bolts per runner job. Finding the holes in the seat to bolt in to was not straight forward, but I got there in the end. Next job was to fit the holding bolts. I use M8 x 30 hex bolts and this puts enough thread through the floor to be able to fit the nut to. Anyway, I followed the GBS instructions on this (did you know there is a download section on the Kit Spares web site with loads of really useful bits of information? No I didn't either .... I think it must be a fairly recent addition)
Anyway, the order is bolt, washer, seat runner, washer, nyloc nut, to get the look below. Then penny washer, carpet, floor, penny washer, nyloc nut. I made the holes in the floor M9 just to give a bit of room for manoeuvre!

Here is the driver's seat fitted.

Just repeat for the other side.

With the interior very close to finished, I turned my attention to the bonnet. I don't need to cut the bonnet for the air intakes as I have the plenum chamber that stays withing the confines of the car, but I do still have to cut the hole for the exhaust.
First thing was to take some measurements so I could sketch it out on some card.

Here it is cut out

I then trial fitted this and found it caught on the no 3 pipe, where you can just see an arrow. I re-sketched the line to miss this.

Which gave me this.
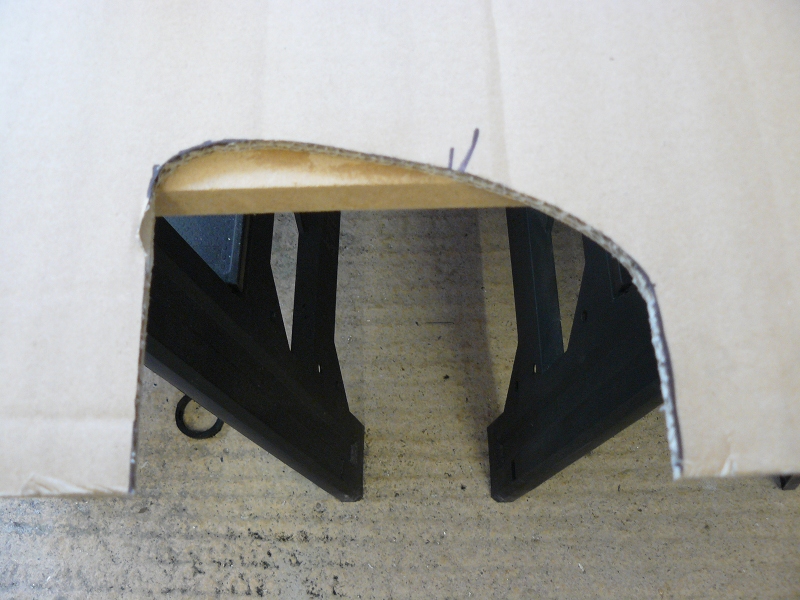
Here is is sitting over the exhaust pipes and allowing space for some trim. I don't think it needs to be any more complicated than that.

I still need to transfer this on to the bonnet and cut the bonnet, but I can't do that until the bonnet is fitted, so that is the next thing for me to move on to.
No comments:
Post a Comment