First job was to re-fit the rear arches. Here is the nearside one.
Here is the inside. I have had a stone guard sprayed on to the insides of the arches, mud guards and nose cone to help the paint finish and also to protect them from stone chips cracking the GRP from the inside.
Here it is with both fitted.
This is the inside of the nose cone. The indicators have been fitted as has the grill. I have used some little brass collets to stop the grill falling out. Not that it would as it is quite a tight fit.
Here is the nose with the indicators fitted. They still have to be wired up.
Next job was to run some cable for the cycle wing indicators. I started by drilling a hole in the cycle wing bracket and once it was large enough, added a rubber grommet.
Next I fed a length of 2 core cable through the hole and up the bracket arm and out the end. I made sure I left enough to wire to the indicator. At the other end, I ran the cable along the upper wishbone arm, securing with cable ties, and then in to the engine bay, ready to wire up. I made sure there was sufficient 'give' in the cable for when the car is on full lock.
With the wiring in place, I moved on to start positioning the cycle wings. Now it must be said that these do not fit very precisely as the angle of the arms is not square to the tyre. I tried to bend them a little further so they were square, but they wouldn't budge so I just laid the wings on as best I could and lined them up by eye. I need to check the orientation for the IVA before I start bonding them in place.
Here is a view from the front.
I then trial fitted the pedal box. I had to make a few alterations and tweaks to make the accelerator pedal fit, but it looks pretty good and all seems to work.
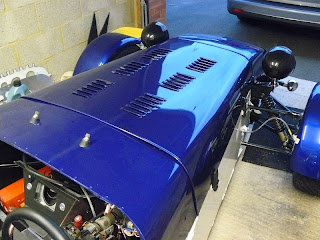
Finally I realised that I hadn't actually fitted the bonnet with the pedal box in place, so I fitted that to make sure it still fitted. OK it was also an excuse to take a couple more pictures.
I still need to add some foam trim round the edge of the nose and under the bonnet edge on the scuttle, but it is getting closer to being ready to go.
I also did a little bit of tidying up of some of the wiring under the scuttle. I can't do it all as I had to remove the Sat Nav to lend to my daughter. Once I get that back I can put it all together, connect the battery for the first time and see what does and doesn't work. Hopefully buying all the plug and play looms will pay dividends here.


Looking good!
ReplyDeleteReally enjoyed your build so far - keep it up.
Cheers. Thanks Chris, I appreciate that.
ReplyDelete