As I mentioned in the last post, I had to remove the drive shatfs and diff to inspect them. I decided to take them to a local garage to get them re-furbished. They are going to put new drive shaft boots on and also new bearing and seals on the diff, if required. Best to have it all done now and not later when it is all more difficult to get at. It would not be fun to fail the IVA on leaking drive shafts boots!
Well I have not got them back yet so I had to move on to something else. First off was a little bit of electrical work. As mentioned elsewhere, I have bought the factory loom for ease but it doesn't just plug in to the ignition block that come off the Sierra. I needed to fit a different block to join to the loom and this was a simple case of cutting some wires, soldering some new spade connectors on to the wires and putting them in a block to connect to the factory loom.
I also had a look at doing some of the plumbing for the fuel runs but realised that the fuel pipe supplied with the kit was OK for 90% of the runs but not for the one from the bottom output of the swirl pot to the input of the high pressure fuel pump. I am going to have to get some more to sort that out.
After doing this I moved on to the left hand side panel. The panel had been on and off the car, dry fitting it several times and there was nothing left to do but to get on and fit it. I put the panel on for one last dry fit, found a few places it needed a bit of tidying and trimming and took care of those. Next was to mark up and drill the few rivets I was going to apply. Now I have seen cars where the builder has possibly used 100 or more rivets on each side panel, but I was going to use as few as possible. I had been told by the factory that they only bond the side panels on and put in a few token rivets, more to keep the IVA inspector happy then anything else. I figured that if it was good enough for the factory, it was good enough for me. Having said that, I have already put in more than them and I may put a few more in yet!!
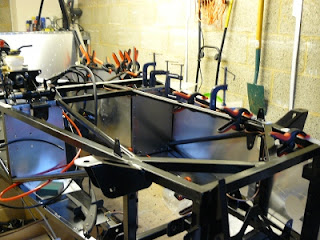
Anyway, next thing to do was rub down the surfaces to be bonded to get a key for the glue to stick to. Once done, I ran a bead of sealant/glue down all the surfaces that contact would be made. Finally, I had no excuses left, the panel was ready to be fitted. I slowly maneuvered it in to place and then set about riveting and clamping everything up. I had bought some extra clamps for the job and used every clamp I had and some box tubing to help apply some pressure.
Here is another view from the inside after more clamps had been applied.
All I can do now is wait for it to go off. Overnight would be fine, but mine will get left until next weekend, only because I am at work during the week, so it should be well and truly fixed. I am going to be really stuffed if it needs to come off for any reason as I don't think it is going anywhere!!


No comments:
Post a Comment